PRE-K & KINDERGARTEN · FRUIT SCIENCE
How to Teach Preschoolers About the Inside of Fruits
Start with a whole fruit, invite children to describe its outside, then have an adult cut it open. Compare the skin, flesh and any visible seeds. Let children draw, point or dictate what they notice, then use a simple flip book to revisit the parts one page at a time.
The goal is careful observation, not memorizing every botanical term. An apple, orange and peach offer useful contrasts, but one fruit is enough for a first lesson. You can run the activity with pictures when food is unsuitable.
Who is this activity for, and how long does it take?
Use it with Pre-K or kindergarten children with adult reading and preparation support. Plan roughly 15–25 minutes for observing and discussing one fruit; allow extra time for drawing or coloring. These are adjustable planning suggestions, not classroom-tested timings. For a shorter session, explore the outside and inside today and make books another day.
Materials to gather
- One washed apple; an orange or peach is optional for comparison.
- A cutting board, knife and tray for adult use only.
- Blank paper and crayons; optional printed fruit pictures or flip-book sheets.
- A magnifier if available, plus paper towels and a waste container.
- For the printable books: adult-operated scissors and stapler.
Check allergies, school food rules and family preferences before bringing fruit. Tasting is optional and never necessary. Keep knives, loose seeds and pits away from children; use enlarged pictures for close inspection.
A five-step fruit observation lesson
1. Look at the outside
Show the whole apple. Ask, “What do you notice?” Accept color, shape, a stem or a patch on the skin. Follow with, “What do you think might be inside?” Record a few predictions without correcting them yet. Children may point instead of speaking or touching.
2. Watch an adult reveal the inside
On a stable board beyond children’s reach, an adult cuts the fruit. Keep the knife out of reach immediately afterward. Place the halves on a tray for viewing. Ask, “What can we see now that we could not see before?” Give quiet looking time before introducing labels.
3. Compare the parts you can actually see
Name the outer skin and the flesh inside. With an apple, point to the core and visible seeds. If comparing an orange, notice its peel and separate segments. With a peach, identify the hard pit. Explain that the seed is inside the pit; show a picture instead of opening it.
| Fruit | Look for | Careful wording |
|---|---|---|
| Apple | Skin, flesh, core, seeds | “These seeds are in this apple’s core.” |
| Orange | Peel, segments, possible seeds | “We may find seeds; some oranges are seedless.” |
| Peach | Skin, flesh, hard pit | “The pit surrounds the seed.” |
Avoid teaching that every fruit has an apple-like core or the same number of seeds. Fruit develops from a flower, but the edible parts and seed arrangements vary. University of Illinois Extension explains fruit and seed development; UC Riverside describes seedless Washington navel oranges. For preschoolers, “Different fruits have different insides” is a useful starting statement.
4. Draw or tell one observation
Give each child blank paper. Ask them to draw one inside detail or tell you what to write. Try “I see ___ inside the ___.” An invented seed count is a prediction, not an observation: return to the actual fruit or picture together. Praise the specific noticing rather than the neatness of the drawing.
5. Revisit with a little flip book
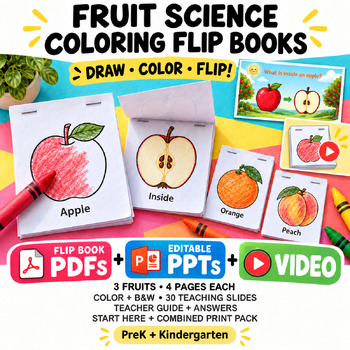
Arrange pictures from whole fruit to an inside detail. Children lift one page, name or point to the newly visible part, then compare it with their drawing. This is a reveal sequence, not a fruit growth cycle. Ask, “Which page helps you show what you noticed?”
Questions that keep children thinking
- “What changed when we looked inside?”
- “Which part helps you know this is an orange?”
- “How is the peach pit different from an apple seed?”
- “What can we say about this fruit? What would we need to check in another one?”
Adjust for different learners or home use
Offer two picture choices and accept pointing, a home-language word or adult dictation. A child who dislikes sticky textures can observe from a distance. For children ready for more, compare two fruits and ask for one similarity and one difference. At home, use one familiar fruit and a folded blank-paper drawing booklet; elaborate materials are unnecessary.
Common questions
What if our orange has no seeds?
Record “We did not find seeds in this orange.” Some oranges are seedless. Do not add pretend seeds to make the observation match a diagram.
Does every child need a book?
No. One adult-held picture sequence can support a shared discussion. Children can show understanding through a drawing or an oral observation.
Can we do this without fresh fruit?
Yes. Use clear whole-fruit and cut-fruit pictures. Say “In this picture, I notice…” so children understand the evidence they are using.
Finish safely and check one idea
Ask each child to point to or name one part and share one observation. Adults collect pits, seeds, scraps and tools, clean the board and table, and supervise handwashing. Do not let children crack pits, eat kernels or loose seeds, or handle knives. If you offer food separately, follow your setting’s allergy, hygiene and age-appropriate serving rules; participation never depends on tasting.